
How to Fix the “Critical Process Died” Error in Windows 10 & Windows 11

The “Critical Process Died” error is a common Blue Screen of Death (BSOD) issue faced by Windows 10 and Windows 11 users. When this error occurs, Windows fails to load correctly and repeatedly crashes, making the system unusable.
This article provides a step-by-step, practical guide to diagnose and fix the issue using proven recovery methods—from basic startup repair to a full Windows reset.
What Causes the “Critical Process Died” Error?
%20How%20to%20Fix%20Critical%20Process%20Died%20Blue%20Screen%20Error%20on%20Windows%2010%20&11.png)
This error can be triggered by several factors, including:
-
Corrupted Windows system files
-
Faulty or incompatible device drivers
-
Registry file corruption
-
Failed or buggy Windows updates
-
Hardware changes or failing hard drives/SSDs
-
Windows OS boot-level corruption
Because multiple causes are possible, troubleshooting must be done step by step.
Step 1: Force Windows into Recovery Mode

If you cannot access the recovery options normally, you can force Windows to enter Automatic Repair Mode.

How to Do It:
-
Turn off your PC completely.
-
Turn it on and force shutdown as soon as Windows starts loading.
-
Repeat this process 2–3 times.
-
On the third attempt, Windows will automatically load Recovery Options.
You may see messages like:
-
“Automatic Repair couldn’t repair your PC”
-
“Startup Repair failed”
Click Advanced Options to proceed.
Step 2: Run Startup Repair
Startup Repair automatically detects and fixes boot-related issues.
-
Go to Troubleshoot → Advanced Options
-
Select Startup Repair
-
Choose your user account and enter your password (if required)
If the process takes longer than 30–40 minutes, cancel it and proceed to the next step.
Step 3: Repair Windows Using Command Prompt

If Startup Repair fails, use built-in Windows repair commands.
Open Command Prompt:
-
Troubleshoot → Advanced Options → Command Prompt
1. Run System File Checker (SFC)
sfc /scannow
This command scans and repairs corrupted system files.
2. Run DISM Command
DISM /Online /Cleanup-Image /RestoreHealth
If DISM fails, try running it with the executable:
DISM.exe /Online /Cleanup-Image /RestoreHealth
3. Offline SFC Scan (If Windows Won’t Boot)
sfc /scannow /offbootdir=C:\ /offwindir=C:\Windows
This scans Windows files directly from the installation drive.
4. Check Disk for Errors (CHKDSK)
chkdsk /f /r C:
This command scans for bad sectors and fixes file system errors.
The process runs in five stages and may take some time.
Once completed, type:
exit
Restart your system and check if the error is resolved.
Step 4: Use System Restore (Highly Recommended)
")
If the error persists, restoring Windows to a previous working state is often the fastest fix.
-
Go to Advanced Options → System Restore
-
Select your administrator account
-
Choose a restore point created when your system was working properly
-
Click Next → Finish → Yes
⚠️ If no restore points are available, move to the next step.
Step 5: Reset This PC (Last Software Solution)
If none of the above solutions work, resetting Windows is recommended.
Important Before Resetting:
-
Back up Desktop, Downloads, Documents
-
Save MS Office / Excel license keys
-
Windows activation will restore automatically
Reset Steps:

-
Troubleshoot → Reset This PC
-
Select Remove Everything
-
Choose Local Reinstall (recommended if cloud download fails)
-
Select Only the drive where Windows is installed (C:)
-
Click Reset
⚠️ Plug your laptop into a charger before proceeding.
This will:
-
Remove all personal files
-
Remove installed apps
-
Restore Windows to a fresh state
Step 6: Clean Windows Installation (If Reset Fails)
If resetting does not fix the issue:
-
Create a bootable USB drive
-
Perform a fresh Windows installation
-
Restore your backed-up data afterward
8. Scan your hard drive
A CHKDSK hard drive scan looks for damaged parts of the hard drive, including corrupted file systems and physical damage to the disc itself — both common causes of the blue screen of death.
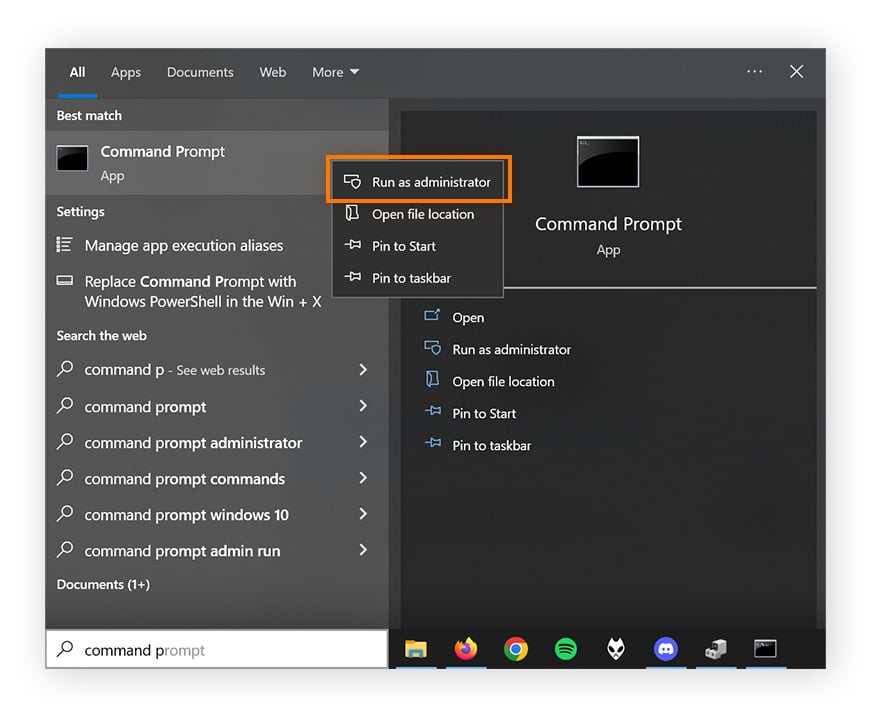
To run a CHKDSK scan, press the Windows key and type "cmd". Right-click Command Prompt and select “Run as Administrator". Click “Yes” or “OK” if prompted.
Then, simply type “chkdsk” and hit Enter to run the command line and initiate the scan.
 If the scan identifies drive errors, you need to run a new CHKDSK process to repair them. Type “chkdsk /r” into Command Prompt and hit Enter — this will launch a deeper diagnostic scan and restore damaged hard drive sectors so that they're readable within the file system.
Hardware does degrade over time, so if your disk is more than a few years old, you should perform this kind of hard drive test regularly to catch issues before they result in a crash.
9. Check your computer's RAM
If problems with your RAM have caused a BSOD, the Windows Memory Diagnostic tool will help you identify the specific issue.
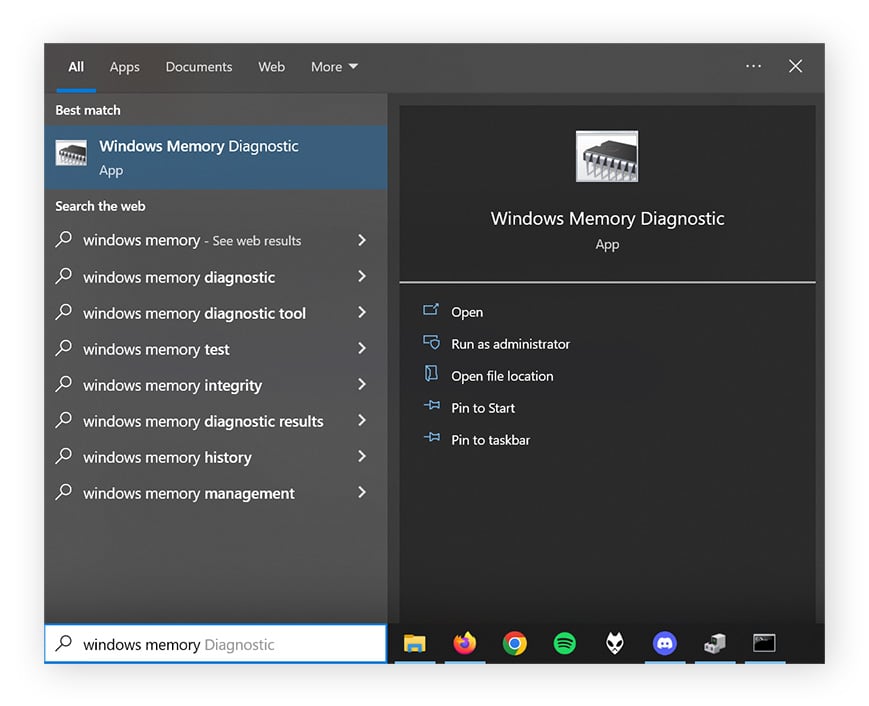
To check if your computer’s RAM is functioning correctly, press the Windows key, type “Windows Memory Diagnostic,” and press Enter.
Then, click Restart now and check for problems (recommended) when you’re ready.
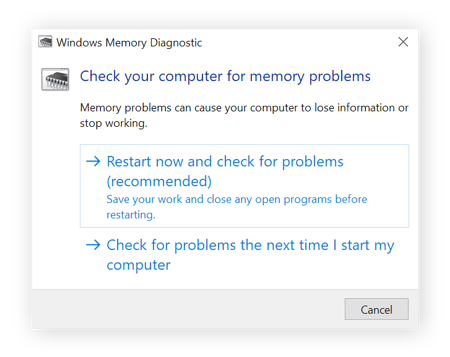
The results of the diagnostic will show as soon as your computer starts up again. If you would like to refer to them again, you can view them in the Event Viewer.
When to Consider Hardware Replacement
If the “Critical Process Died” error still occurs after a clean installation, the issue is likely hardware-related, such as:
-
Failing SSD or hard drive
-
Faulty RAM
-
Motherboard issues
In this case, professional hardware diagnostics or replacement is recommended.
Final Thoughts
The “Critical Process Died” error can look serious, but in most cases, it is completely fixable using Windows recovery tools. Start with basic repairs and progress gradually to advanced solutions like system restore or reset.
If software solutions fail, hardware inspection is the final step.
By following this guide carefully, you should be able to restore your system to a stable and working condition.


0 Comments